참고자료 및 정보
FCM 수신 환경 설정하기
- [Android] FCM 푸시 알림 구현하기 (2) 글에는 안드로이드 스튜디오 내에서 파이어베이스 및 FCM 연동을 해봤다.
2022.09.08 - [Firebase/FCM] - [Android] FCM 푸시 알림 구현하기 (2) - 파이어베이스 및 FCM 연동
- 이제 FCM 메세지를 받을 수 있게 코드를 구현해보자
- 공식 문서를 기준으로 구현할 것이다.
안드로이드 클라이언트 설정
1. manifests/AndroidManifest.xml에 메시지 이벤트 등록하기
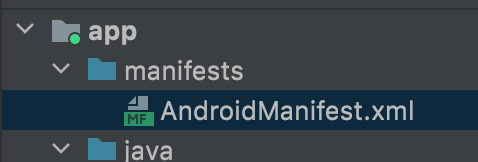
<service
    android:name=".java.MyFirebaseMessagingService" // 처음 등록시 이 부분에서 빨간줄이 표시되는데 Java클래스를 아직 만들지 않아서 생긴것으므로 걱정하지말자
    android:exported="false">
    <intent-filter>
        <action android:name="com.google.firebase.MESSAGING_EVENT" />
    </intent-filter>
</service>- 해당 코드를 넣어주면 되는데 <application> <service></servcie> </application>태그 안에다가 넣어주면 된다.
2. MyFirebaseMessagingService 클래스 생성
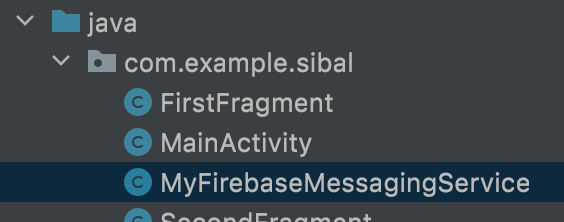
- 해당 루트에 FCM 메세지 로직을 위한 클래스를 생성하고 아래의 코드를 넣어준다.
- 자바 클래스 이름 : MyFirebaseMessagingService
- 생성 클래스 안의 로직
import android.app.Notification;
import android.app.NotificationChannel;
import android.app.NotificationManager;
import android.os.Build;

import androidx.annotation.NonNull;
import androidx.core.app.NotificationCompat;
import androidx.core.app.NotificationManagerCompat;

import com.google.firebase.messaging.FirebaseMessagingService;
import com.google.firebase.messaging.RemoteMessage;

public class MyFirebaseMessagingService extends FirebaseMessagingService {
    private static final String CHANNEL_ID = "1";
    private static final CharSequence CHANNEL_NAME = "TEST";
    private static final String TAG = "token : ";
    @Override
    public void onNewToken(@NonNull String token){
        super.onNewToken(token);
        // 토큰 서버 전송
        // 나중에 추가 로직 해도됨.
    }

    @Override
    public void onMessageReceived(@NonNull RemoteMessage remoteMessage) {
        super.onMessageReceived(remoteMessage);
        // 수신 메세지 처리
        NotificationManagerCompat notificationManager = NotificationManagerCompat.from(getApplicationContext());

        NotificationCompat.Builder builder = null;
        if (Build.VERSION.SDK_INT >= Build.VERSION_CODES.O) {
            if (notificationManager.getNotificationChannel(CHANNEL_ID) == null) {
                NotificationChannel channel = new NotificationChannel(CHANNEL_ID, CHANNEL_NAME, NotificationManager.IMPORTANCE_DEFAULT);
                notificationManager.createNotificationChannel(channel);
            }
            builder = new NotificationCompat.Builder(getApplicationContext(), CHANNEL_ID);
        }else {
            builder = new NotificationCompat.Builder(getApplicationContext());
        }


		String notification_title = remoteMessage.getNotification().getTitle();
        String notification_body = remoteMessage.getNotification().getBody();

        builder.setContentTitle(notification_title)
                .setContentText(notification_body)
                .setPriority(NotificationCompat.PRIORITY_HIGH)
                .setSmallIcon(R.drawable.ic_launcher_background);

        Notification notification = builder.build();
        notificationManager.notify(1, notification);
    }

}
코드 설명
- onMessageReceived 함수는 안드로이드에서 수신할 메세지를 어떻게 처리할 것인가에 대한 로직을 넣으면 된다. (기본적으로 돌아다니는 코드를 삽입했다.)
- 아래 사진 부분은 FCM 백엔드 서버에서 수신받을 데이터 문자를 가져오는 코드인데 메세지 타입중에 notification과 data 둘 중 어느것으로 보내느냐에 따라 달라질 수 있다.

- 결국 메세지 형태가 어떻게 보내지느냐(noti 또는 data)에 따라 클라이언트에서는 알맞게 분기처리를 하거나 그대로 받으면 된다.
- 하지만 중요한 것은 notification과 data 형태는 기기의 백그라운드/포그라운드에서 차이가 발생한다. 공통적으로 notification을 사용하면 백그라운드/포그라운드 상관없이 푸시알림 메세지의 데이터가 표시된다. (아래 사진 참고)
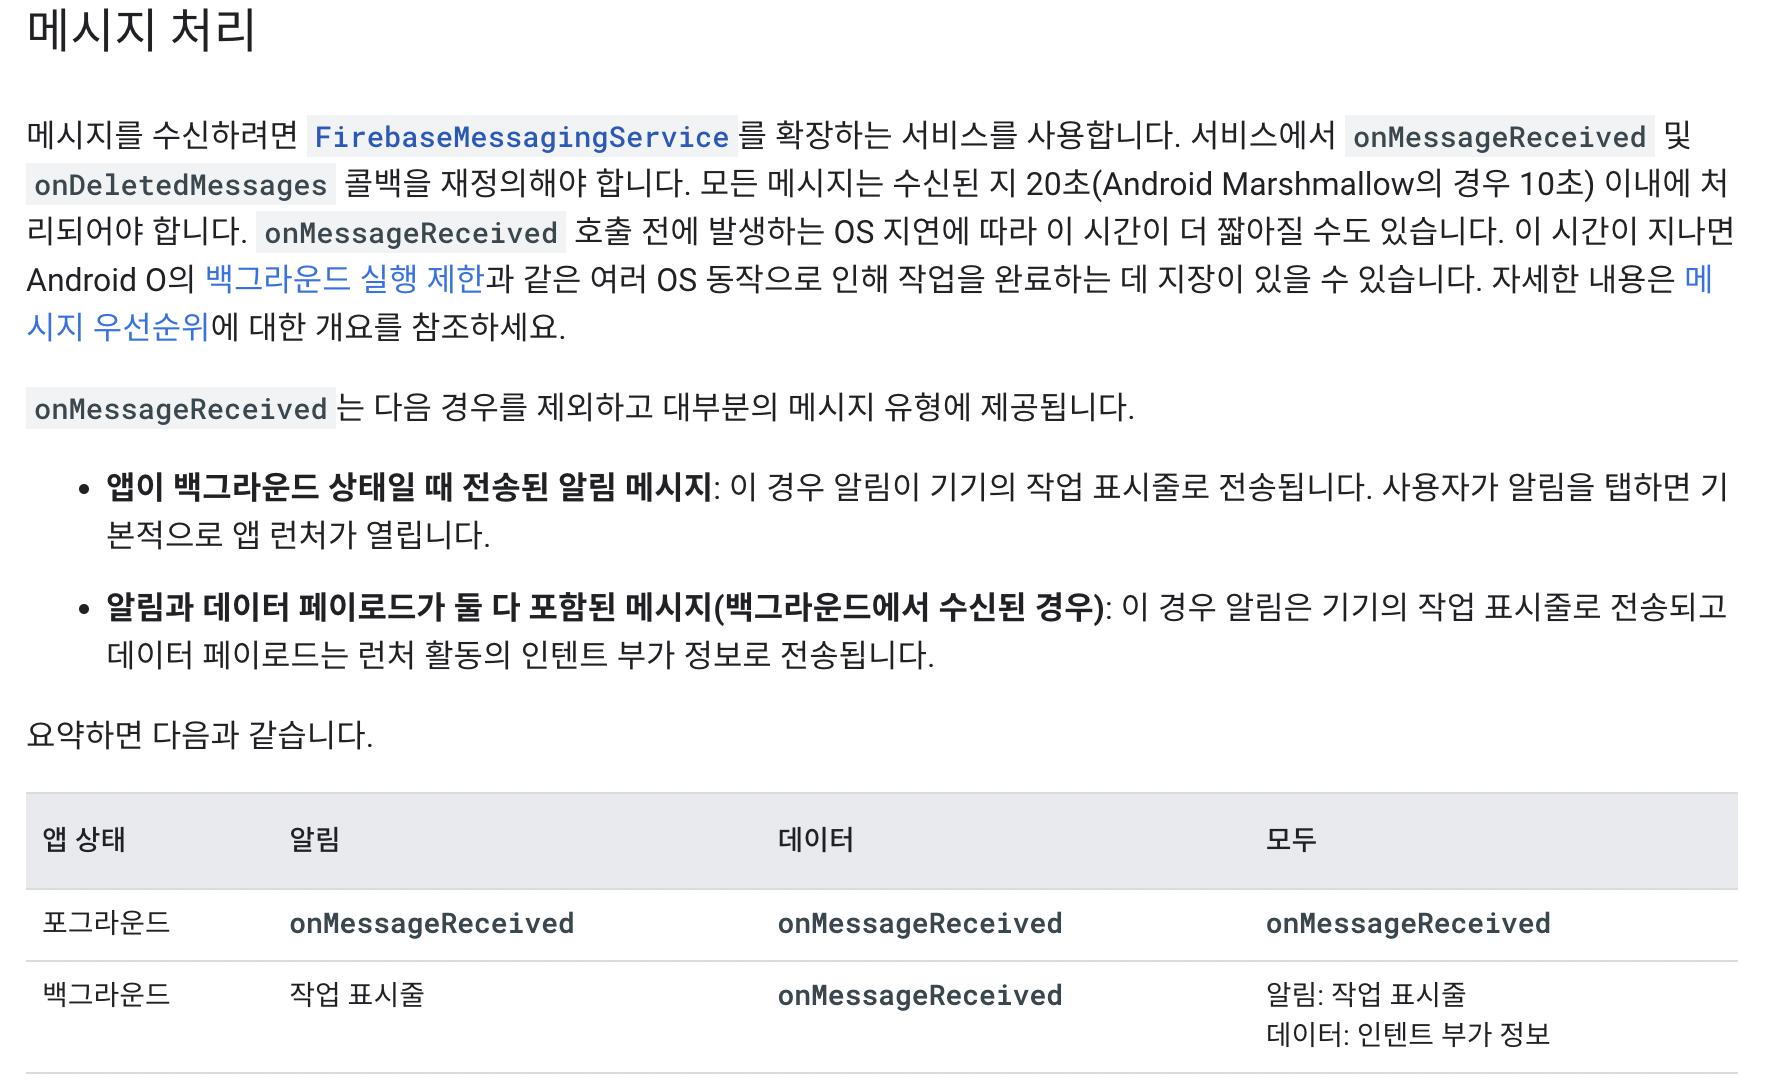
※ 참고 사진 (공식문서)
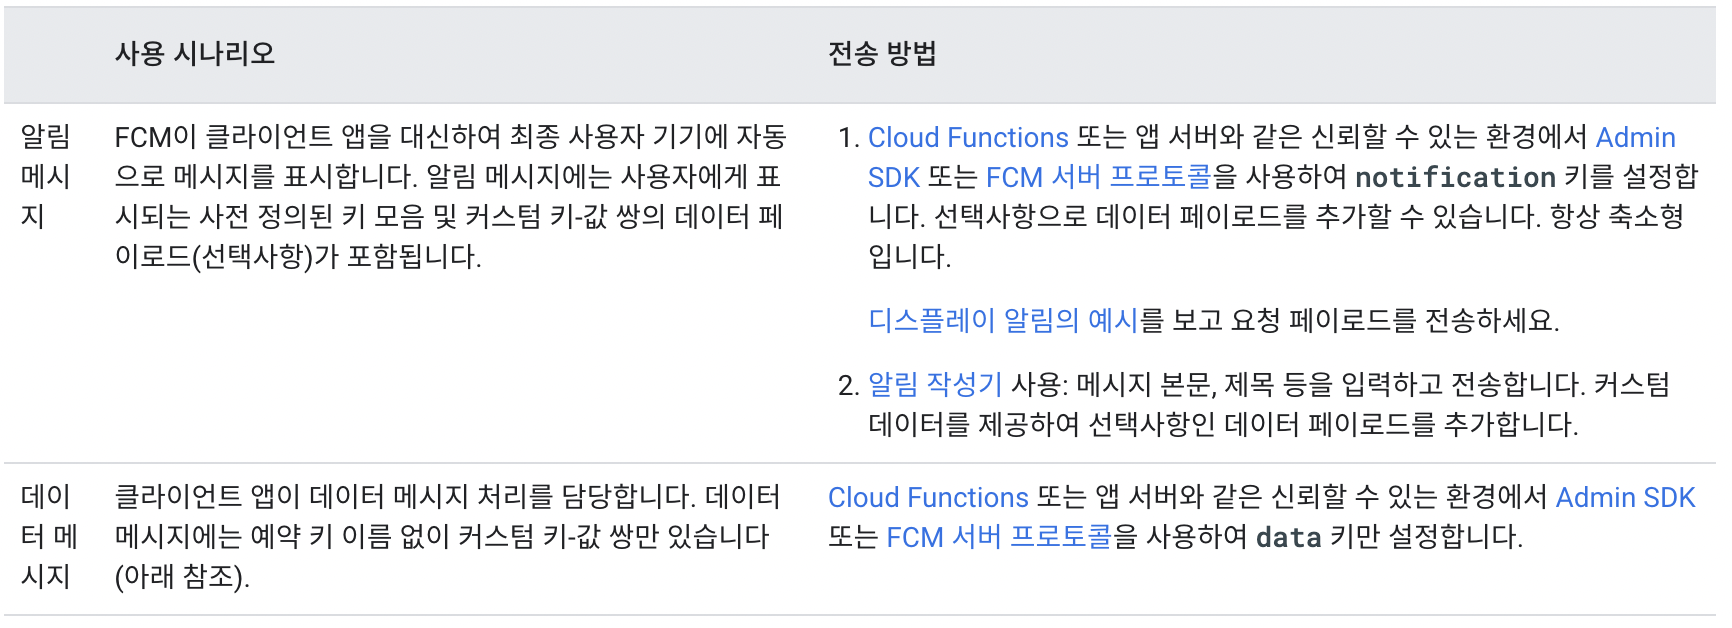
구글에 "FCM notification 과 data 의 차이"라고 치면 여러 정보가 나온다 참고하면 좋을것 같다.
- 그리고 안드로이드 8.0(오레오)버전 이상부터 FCM 채널을 등록해주어야 한다고 한다. 안그러면 푸시 알림을 못받는다고 한다.
        if (Build.VERSION.SDK_INT >= Build.VERSION_CODES.O) {
            if (notificationManager.getNotificationChannel(CHANNEL_ID) == null) {
                NotificationChannel channel = new NotificationChannel(CHANNEL_ID, CHANNEL_NAME, NotificationManager.IMPORTANCE_DEFAULT);
                notificationManager.createNotificationChannel(channel);
            }
            builder = new NotificationCompat.Builder(getApplicationContext(), CHANNEL_ID);
        }else {
            builder = new NotificationCompat.Builder(getApplicationContext());
}- 해당 코드가 채널을 등록하는 부분이다.
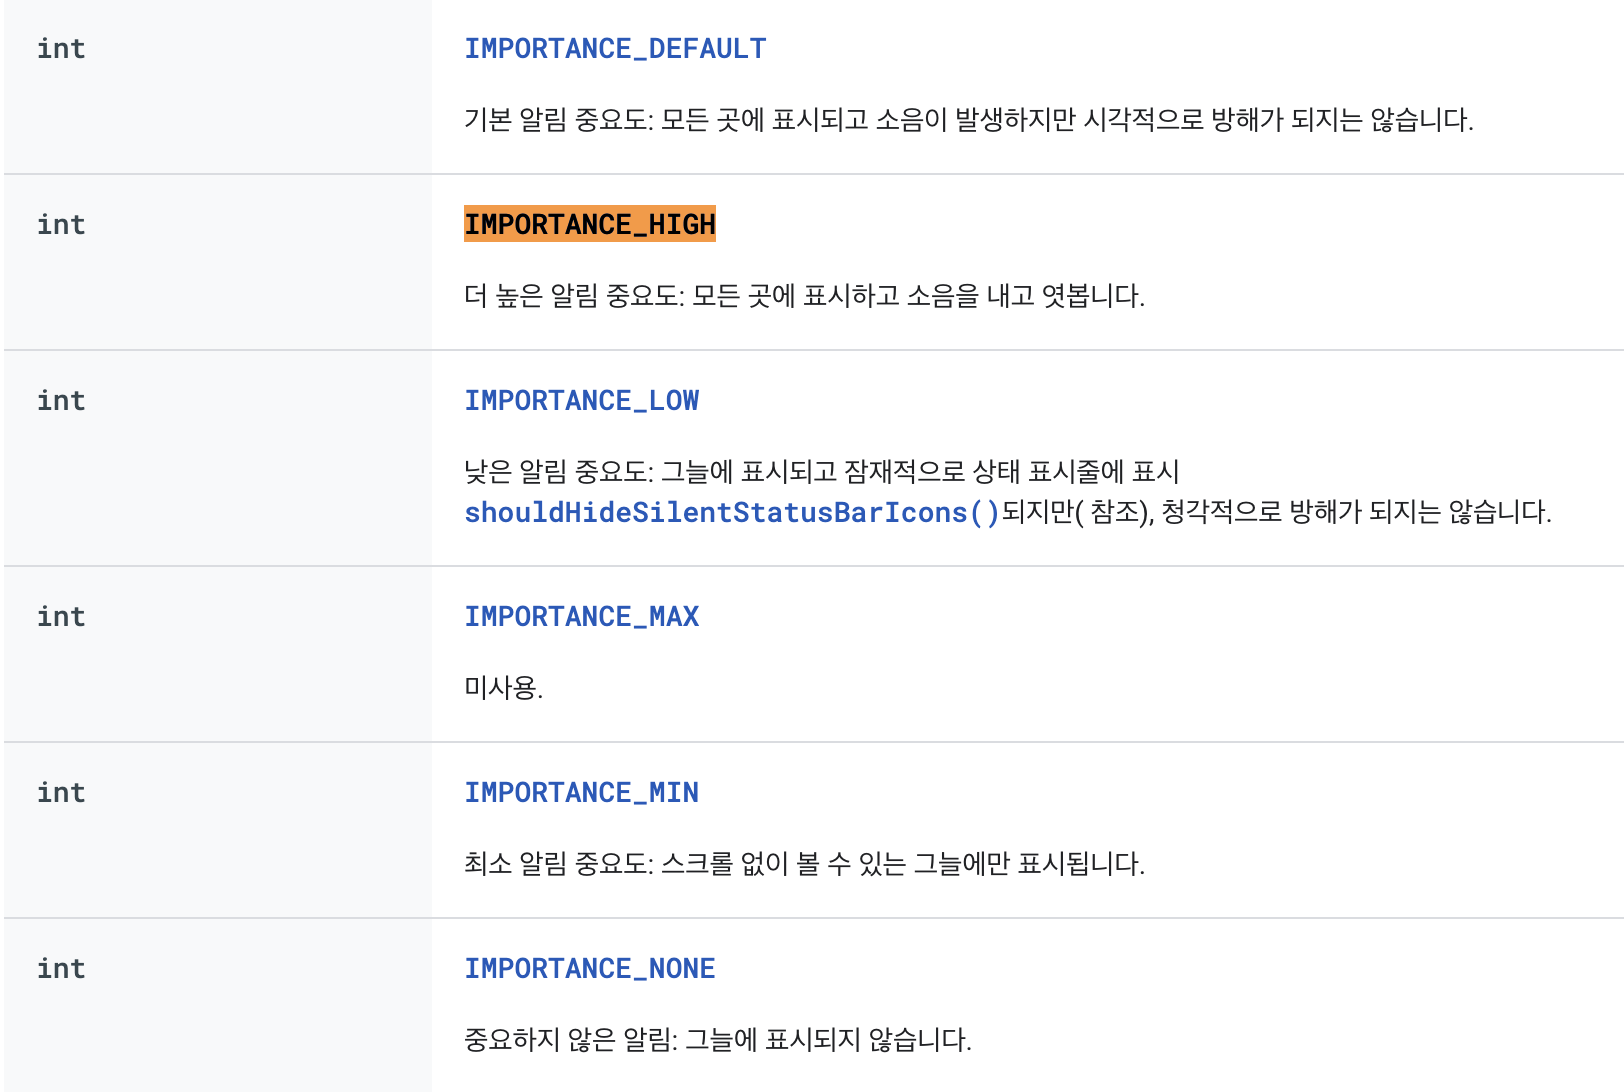
- new NotificationChannel에 들어가는 매개변수는 채널 아이디, 채널 이름, 푸시알림의 중요도이다. (해당 부분에 대한 심화적인 내용은 추후 다루겠습니다.)
- 채널 아이디와 채널이름은 자기가 하고싶은대로 해주자 대신 채널 아이디는 마지막에 int형으로 지정해주어야하니까 숫자를 문자열로 지정해주자 (예를 들어 1을 "1"로... , 원본 코드의 윗줄에서 상수로 지정한 것을 보면 이해가 갈거다 )
출처 : https://developer.android.com/reference/android/app/NotificationManager
- 마지막 줄의 코드를 살펴보자
builder.setContentTitle(title)
                .setContentText(body)
                .setPriority(NotificationCompat.PRIORITY_HIGH)
                .setSmallIcon(R.drawable.ic_launcher_background);

        Notification notification = builder.build();
notificationManager.notify(1, notification);- setContentTitle과 setContentText는 뭘 뜻하는지 보면 알 수 있을것이다. 수신 받은 메세지를 title과 body로 구분하여 노티빌더라는 객체에 넣어준다.
- 보시다시피 다른 설정들도 같이 해줄수 있는데 setPriority() 메세지의 우선순위를 나타낸다. (참고 : https://firebase.google.com/docs/cloud-messaging/android/message-priority )
- setSmallIcon은 푸시 알림의 아이콘을 지정해주는데 이것도 그냥 떠도는 코드를 가져왔다.
마지막 줄의 notificationManager.notify(1, notification)를 보면 첫번째 매개변수로 1을 전달해줬는데 이는 우리가 위에서 등록한 FCM의 채널 아이디이다.
3. MainActivity 코드 삽입
- onCreate()함수 안에 아래의 코드를 입력한다.
// FB FCM 토큰 가져오기
        FirebaseMessaging.getInstance().getToken()
                .addOnCompleteListener(new OnCompleteListener<String>() {
                    @Override
                    public void onComplete(@NonNull Task<String> task) {
                        if (!task.isSuccessful()) {
                            Log.w("Test token", "Fetching FCM registration token failed", task.getException());
                            return;
                        }

                        // Get new FCM registration token
                        String token = task.getResult();

                        // Log and toast
                        Log.i("Test token", token);
                        Toast.makeText(MainActivity.this, token, Toast.LENGTH_SHORT).show();
                    }
});- FCM에 토큰을 요청하고 해당 토큰을 가져오는 로직이다.
- 우리는 아직 서버단을 구축하지 않았기에 안드로이드 스튜디오 내의 로그와 앱 내의 토스트 알림으로 토큰을 보여주게 할 것이다.
- 그리고 해당 토큰을 가지고 파이어베이스 FCM 콘솔에서 테스트 메세지를 작성하고 푸시 알림을 보내볼 것이다.
푸시 알림 테스트 진행
안드로이드 로그 확인
- 안드로이드 기기를 컴퓨터 또는 노트북과 연결 후 실행시킨다.
- 이상없이 잘 실행이 되었으면 안드로이드 스튜디오의 로그를 확인한다.
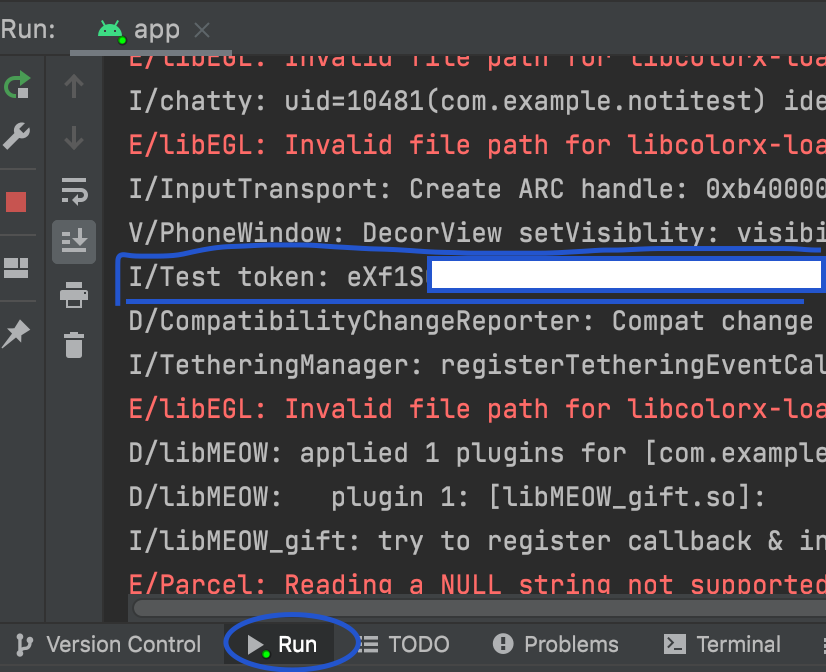
- 해당 토큰을 복사해두거나 메모장에 저장해둔다
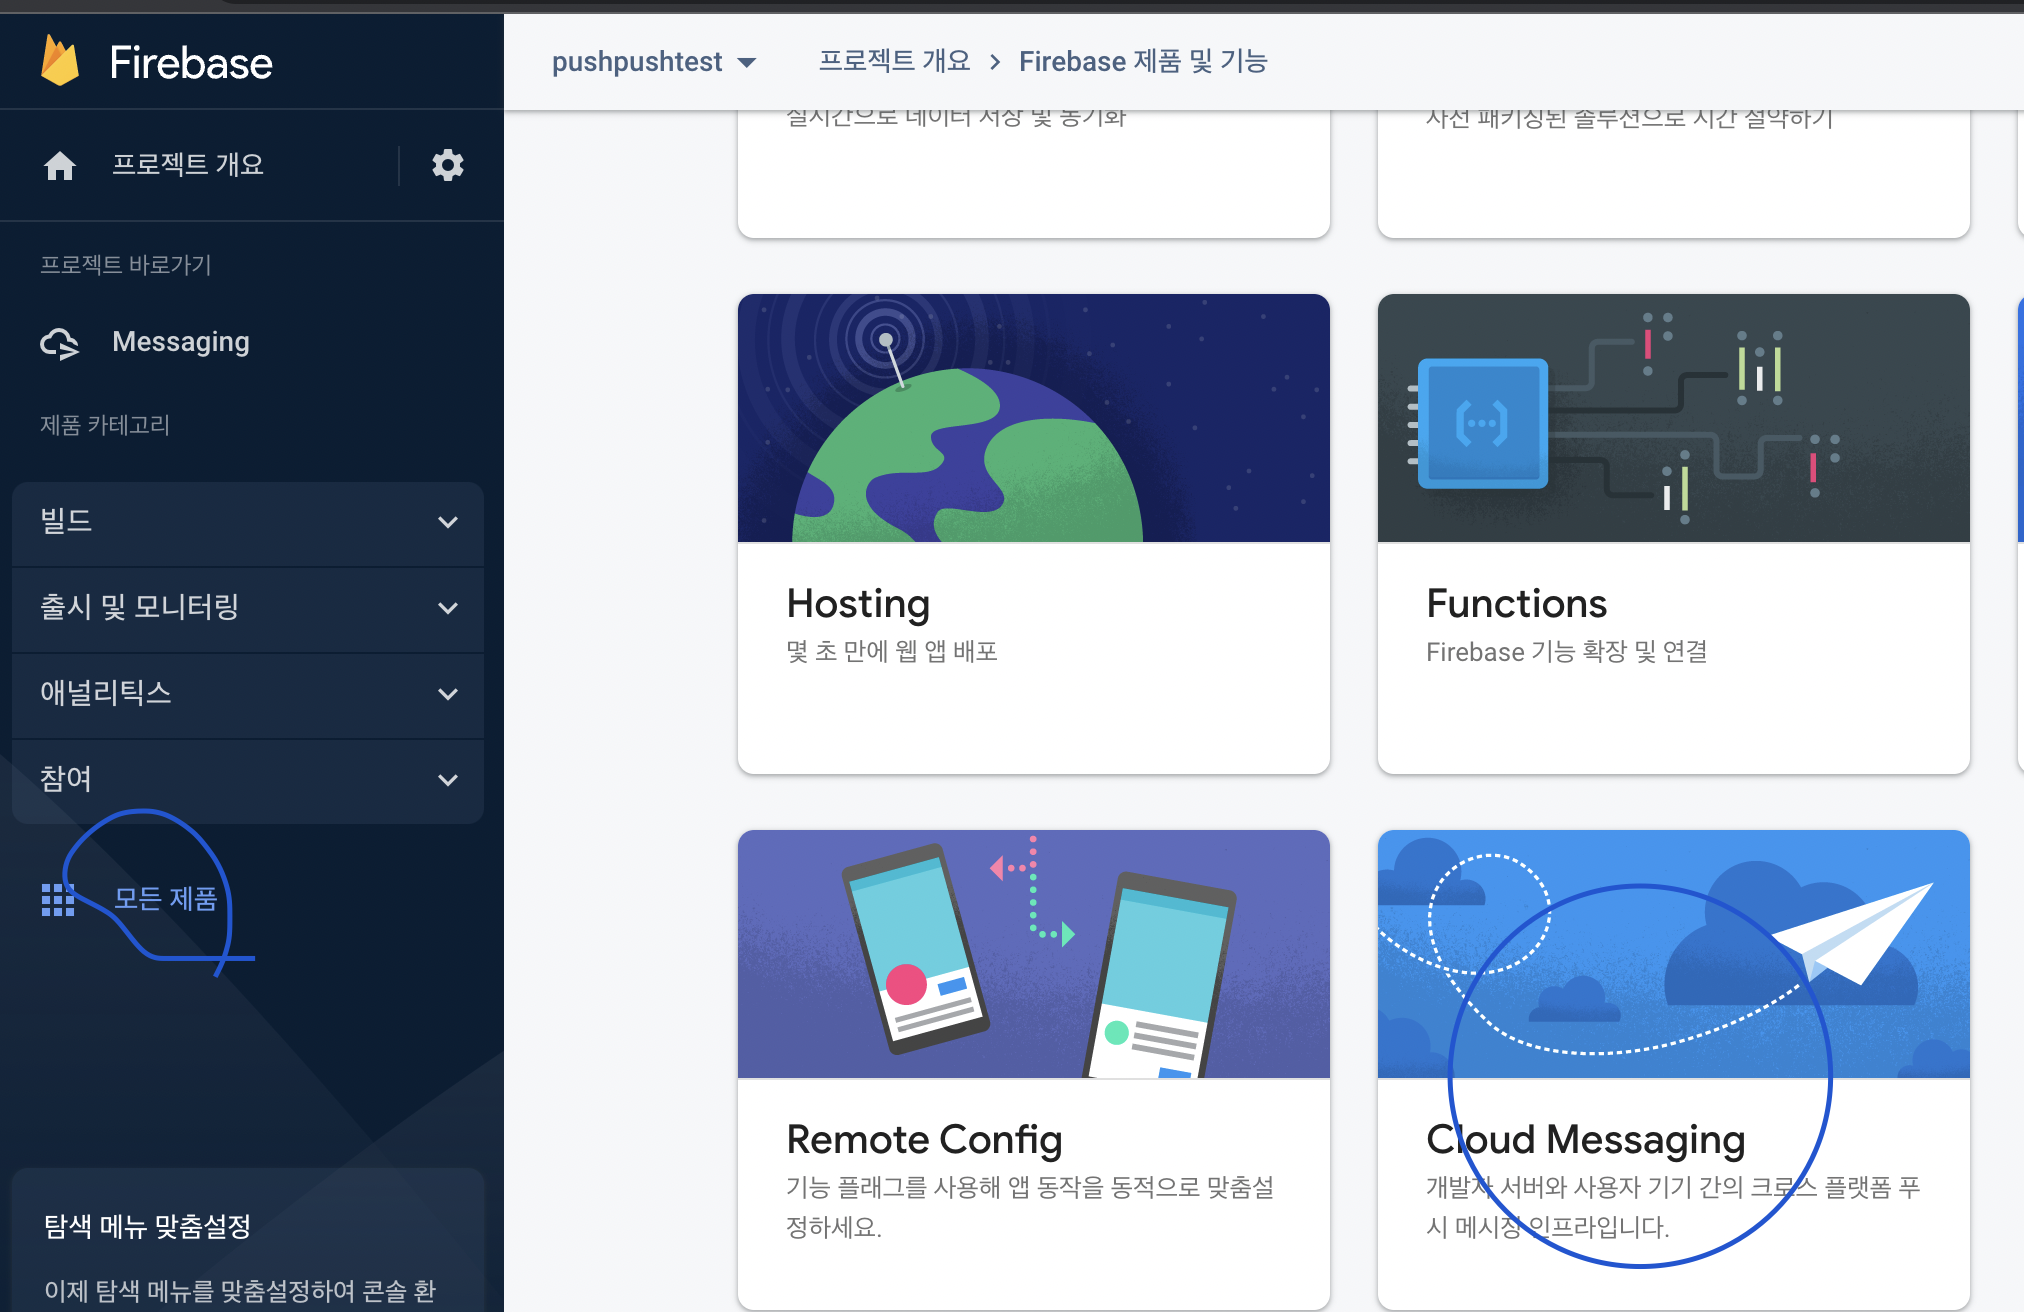
파이어베이스 FCM 콘솔창 이동
- 파이어베이스에 접속한다.
- 우리가 안드로이드 스튜디오랑 파이어베이스랑 연동했을때 만든 프로젝트에 들어간다.
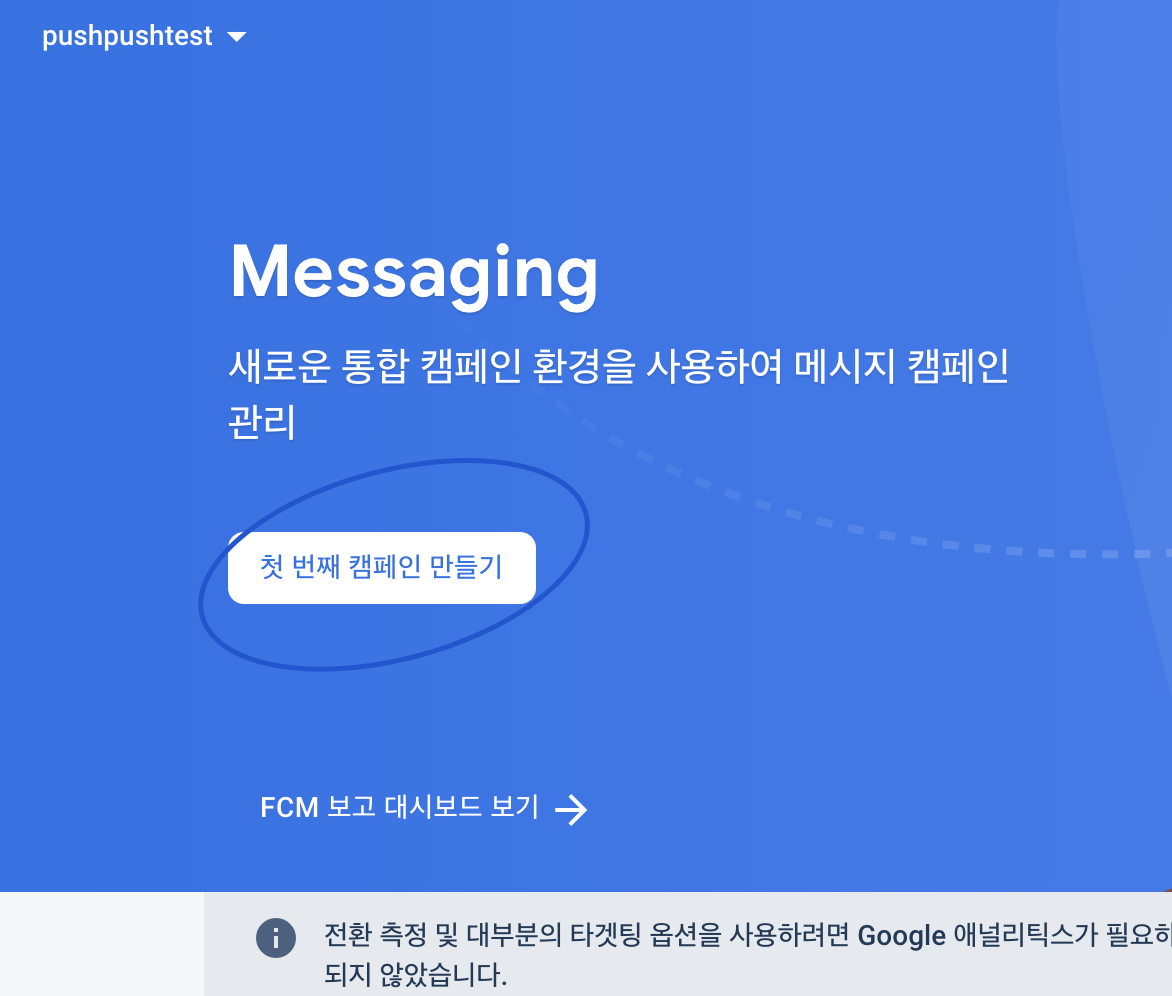
- 왼쪽 메뉴 카테고리의 모든 제품 클릭 후 Cloud Messaging 클릭
- 첫 번째 캠페인 만들기 클릭
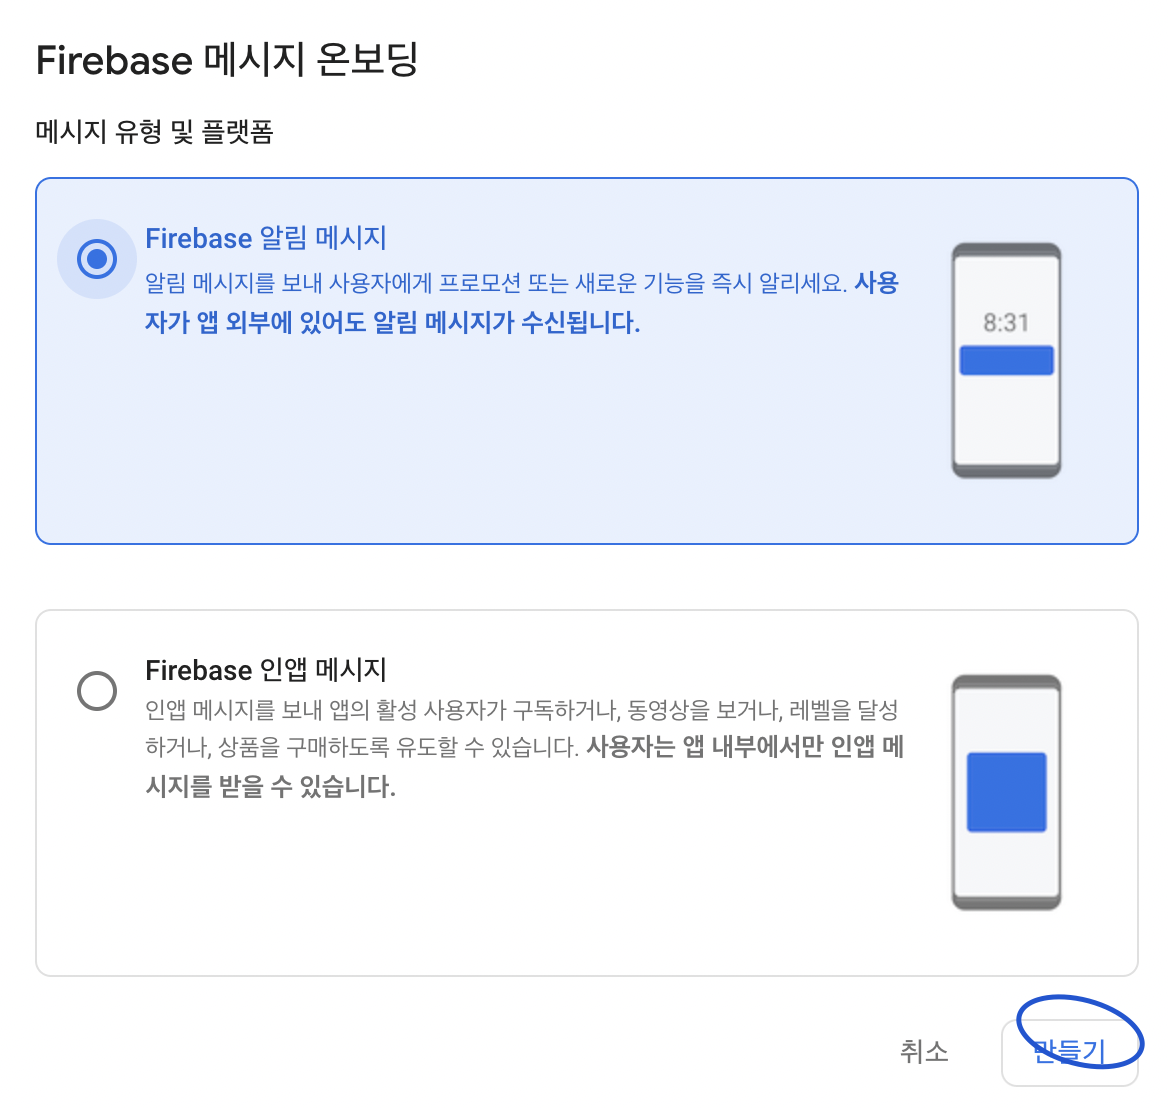
- 메시지 온보딩이 나오는데 Firebase 알림 메세지를 선택하고 만들기를 누른다.
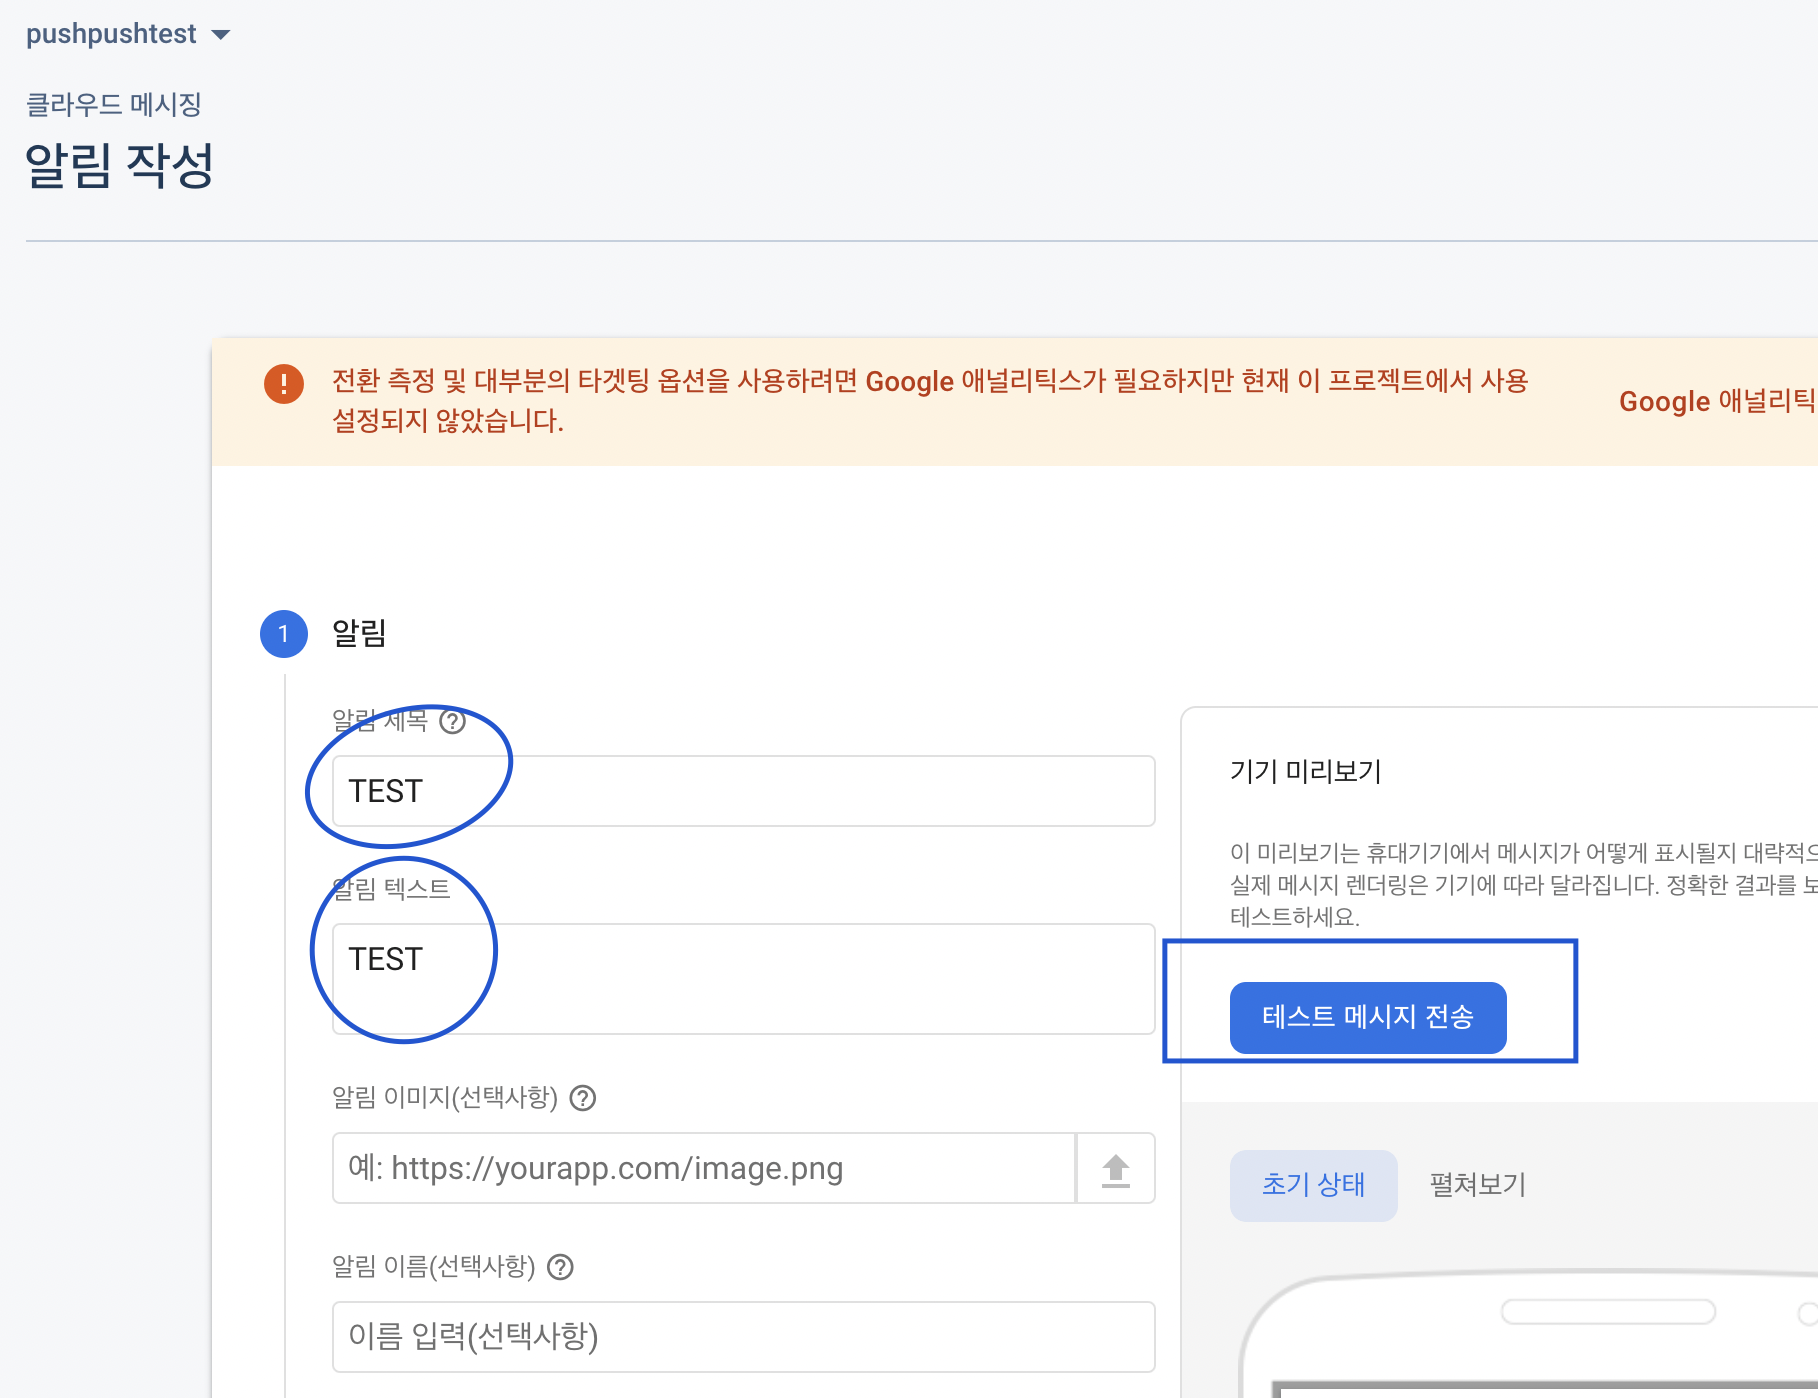
- 알림 제목과 텍스트에 아무 문자열을 입력하고 테스트 메시지 전송 버튼을 누른다.
- 해당 부분에 아까 안드로이드 스튜디오의 로그에서 확인하고 저장한 토큰을 가지고 붙여넣어준다.
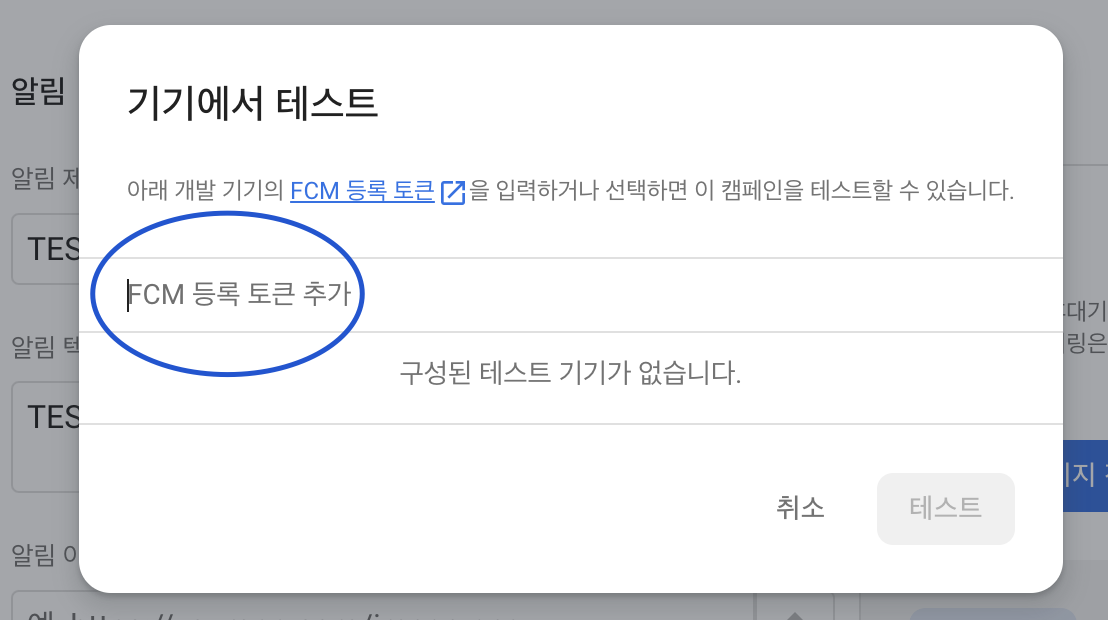
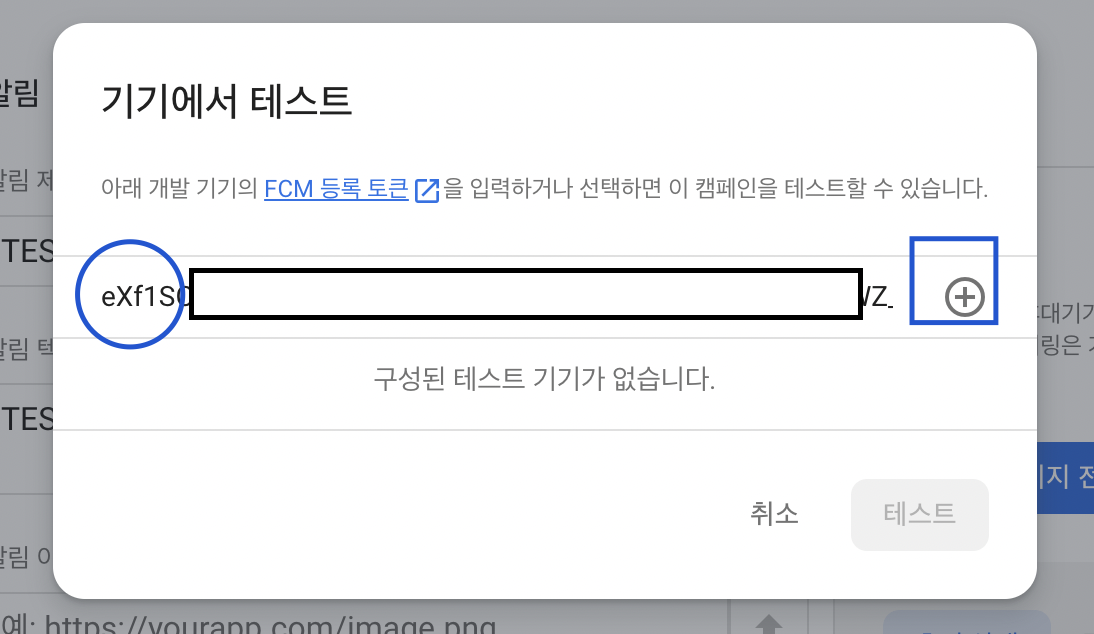
- 토큰을 입력하면 오른쪽에 동그라미 +(플러스)버튼이 표시되는데 그것을 클릭하고 테스트 버튼을 누른다.
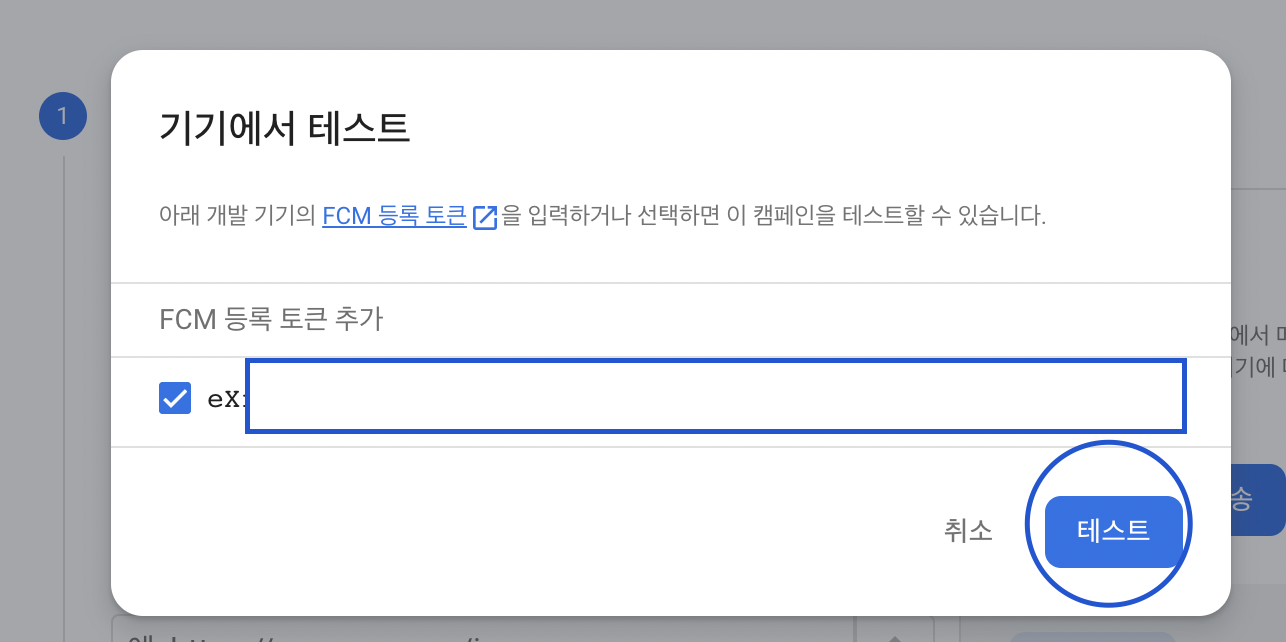
- 그러면 우리 기기에서 푸시 알림을 받을 수 있다.
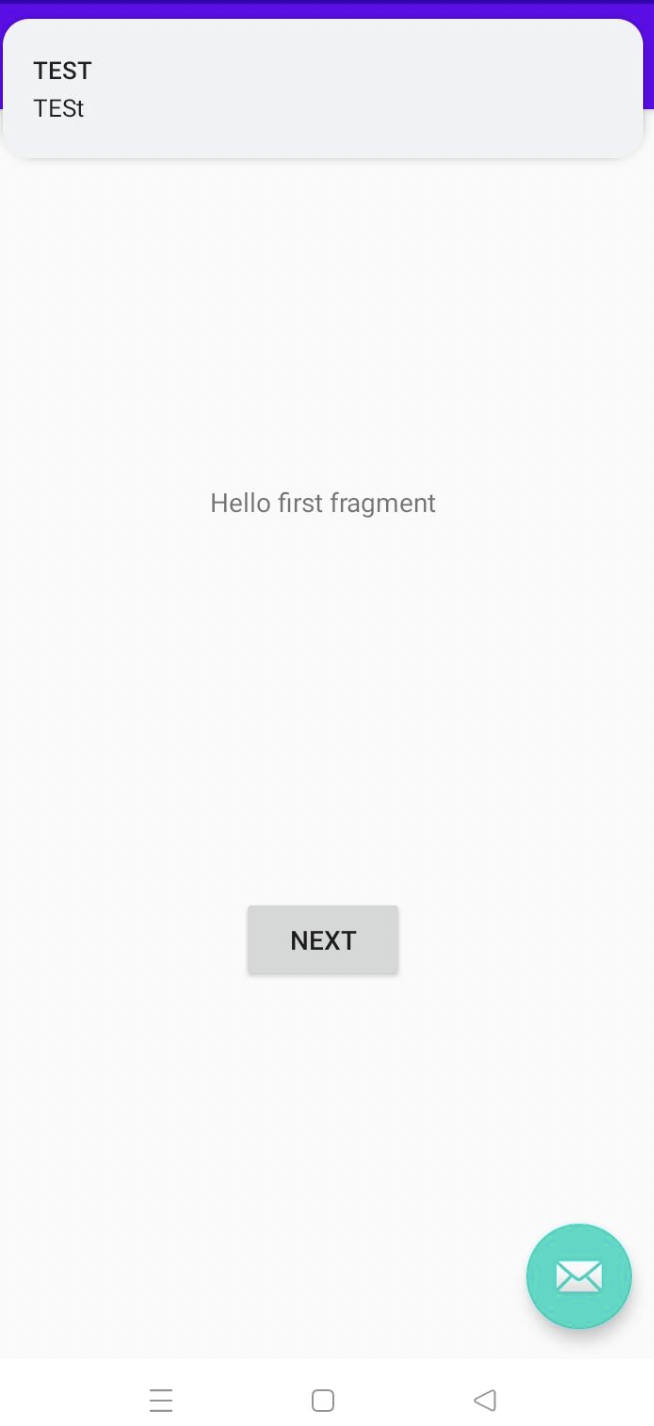
- 이로써 우린 FCM을 이용해 푸시 알림을 받는 환경을 설정하고 테스트까지 진행했다.
- 다음은 서버를 두고 토큰이나 토픽(주제)를 이용한 다양한 방법을 해보고 단일 타켓, 그룹 사용자 등의 실습을 진행하겠다.
- 기회가 된다면 메세지 큐를 적용하는 것도 해볼 생각이다.
반응형
'Firebase > FCM' 카테고리의 다른 글
| [Android] FCM 푸시 알림 구현하기 (2) - 파이어베이스 및 FCM 연동 (0) | 2022.09.08 |
|---|---|
| FCM 이란 (Firebase Cloud Messaging) (0) | 2022.09.08 |
| FCM 푸시 알림 구현하기 (1) - 설계 (0) | 2022.09.08 |


댓글